How To Make A Storage Seat From A Kitchen Cabinet - Built-in Bench Seat from Stock Cabinets / Enhance a kitchen layout with a peninsula.. Kitchen banquette banquette seating kitchen nook diy kitchen corner seating corner bench kitchen layouts table seating kitchen ideas. After a little poking around, it dawned on me that the ikea cabinets that are typically used for over the fridge storage would be the perfect size and a reasonable price. But having the extra storage space is worth it. Just choose a window with a pleasant view, build a frame for your base, then assemble the cabinets and add cushions, pillows, and other comfortable accessories. Having these cabinets is so great for both seating and for storage, and we need that storage!
Apply wood glue to the corner bench support pieces. Then align the end cabinets corner to corner with the center ones. I wanted plenty of storage space in this piece, so i went with two slightly taller cabinets flanking two low cabinets for the bench. The storage boxes that go inside the framing can be built from plywood panels to provide storage inside of the bench. Then i bought some brown fabric from the bargain basement at zimman's in lynn.
How to Plan Your Kitchen Cabinet Storage for Maximum Efficiency | Window seat design, Window ... from i.pinimg.com A window seat can make a quaint and cozy addition to any room in your home. Start by drawing a level line along the wall where the top of your base will go. Then lay them on one side and hold a straightedge across the fronts of the face frames to be sure they form a straight, flat surface. In this video i'll take you through. Still gotta sew a cover for that looooooong cushion for the top. Article by this old house. Check to make sure it's level. Enhance a kitchen layout with a peninsula.
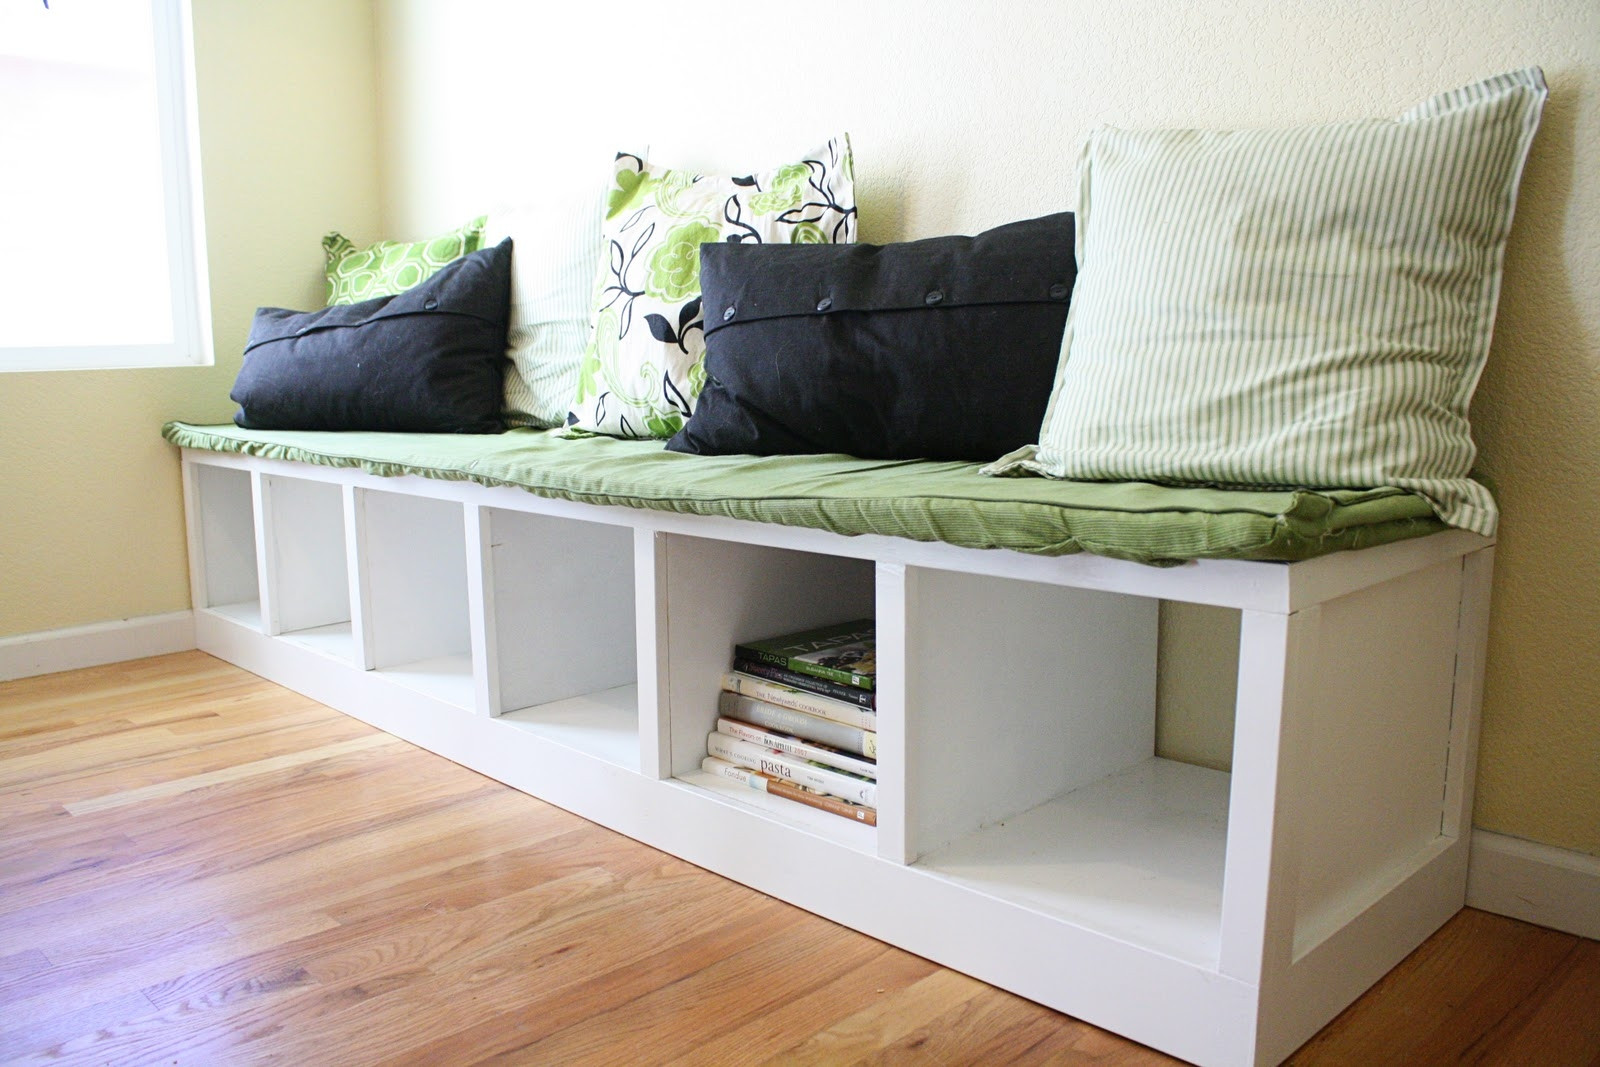
I bought a foam cushion from joann fabrics that fit the footprint of the bench perfectly.
I like to make them using the same tools and materials that i use to fabricate kitchen cabinets out of. Start by drawing a level line along the wall where the top of your base will go. Use shims and a nice long level (like 4′) to ensure that your base top is level. You build this directly onto the wall, and it gives you so much space to keep those bathroom essentials out of sight. The total cost for three cabinets + hinges from ikea = $315 (that does not include the cost of the lumber for the frame.) Then lay them on one side and hold a straightedge across the fronts of the face frames to be sure they form a straight, flat surface. If you're using prefab cabinets, put them in place and then mark the highest point, then draw your level line from there. I wanted plenty of storage space in this piece, so i went with two slightly taller cabinets flanking two low cabinets for the bench. I also love that it has lots of storage underneath for extra dishware and kitchen items that i used to store in my hutch. Kitchen banquette banquette seating kitchen nook diy kitchen corner seating corner bench kitchen layouts table seating kitchen ideas. Build them to size so they will be able to slide into the brackets easily. Just choose a window with a pleasant view, build a frame for your base, then assemble the cabinets and add cushions, pillows, and other comfortable accessories. After shopping for our supplies, the first stage of the process was to build the ikea cabinets.
Draw a straight, vertical line along this point, using a straightedge and pencil. If you're using prefab cabinets, put them in place and then mark the highest point, then draw your level line from there. In this video i'll take you through. Install it underneath to hide your support structure and paint white. Top it with comfortable cushions and pillows and you've got a place the whole family can enjoy.
Pin on Built-Ins from i.pinimg.com Install it underneath to hide your support structure and paint white. Draw a straight, vertical line along this point, using a straightedge and pencil. If you're using prefab cabinets, put them in place and then mark the highest point, then draw your level line from there. Measure from the front of the cabinet back 3 1/2 inches. I wanted plenty of storage space in this piece, so i went with two slightly taller cabinets flanking two low cabinets for the bench. We also turned one of the compartments into a storage area for all of our kitchen. These cabinets are 14 3/4″ deep without the door/ drawer fronts. And finally, i decided to treat myself to having the.
You build this directly onto the wall, and it gives you so much space to keep those bathroom essentials out of sight.
I bought a foam cushion from joann fabrics that fit the footprint of the bench perfectly. Still gotta sew a cover for that looooooong cushion for the top. In every home, there is plenty of unused space that can be identified and harnessed with a little thought and creativity. One of the taller cabinets would house four ikea maximera drawers to store all our silverware and napkins. Having these cabinets is so great for both seating and for storage, and we need that storage! I wanted plenty of storage space in this piece, so i went with two slightly taller cabinets flanking two low cabinets for the bench. After shopping for our supplies, the first stage of the process was to build the ikea cabinets. I love how this bench is simple, but it matches the look of our kitchen. Draw a straight, vertical line along this point, using a straightedge and pencil. I like to make them using the same tools and materials that i use to fabricate kitchen cabinets out of. Then lay them on one side and hold a straightedge across the fronts of the face frames to be sure they form a straight, flat surface. The total cost for three cabinets + hinges from ikea = $315 (that does not include the cost of the lumber for the frame.) Give yourself at least 1/8 or so wiggle room so you don't have trouble sliding them into the brackets.
Drill pilot holes through the bottom of the cabinet into. Apply wood glue to the corner bench support pieces. Make the faces of the cabinet face frames flush with the base front (b), and align the cabinet end panel with the end base divider (c). Top it with comfortable cushions and pillows and you've got a place the whole family can enjoy. Apply construction adhesive to the top of the base and set the cabinets in place.
23 Fascinating Modular Bench Seating with Storage - Home, Family, Style and Art Ideas from theshinyideas.com Start by drawing a level line along the wall where the top of your base will go. Make the faces of the cabinet face frames flush with the base front (b), and align the cabinet end panel with the end base divider (c). Apply wood glue to the corner bench support pieces. After shopping for our supplies, the first stage of the process was to build the ikea cabinets. Enhance a kitchen layout with a peninsula. Check to make sure it's level. If you're using prefab cabinets, put them in place and then mark the highest point, then draw your level line from there. Install it underneath to hide your support structure and paint white.
You build this directly onto the wall, and it gives you so much space to keep those bathroom essentials out of sight.
Then align the end cabinets corner to corner with the center ones. One of the taller cabinets would house four ikea maximera drawers to store all our silverware and napkins. Measure from the front of the cabinet back 3 1/2 inches. Start by drawing a level line along the wall where the top of your base will go. Build it in the ikea kitchen planner for the bench seat i like to select the wall cabinet at 15″ height. Ikea has tons of door styles. Still gotta sew a cover for that looooooong cushion for the top. The storage boxes that go inside the framing can be built from plywood panels to provide storage inside of the bench. Build them to size so they will be able to slide into the brackets easily. Remove the cabinet doors for access to the interior. Apply wood glue to the corner bench support pieces. Drill pilot holes through the bottom of the cabinet into. I also love that it has lots of storage underneath for extra dishware and kitchen items that i used to store in my hutch.